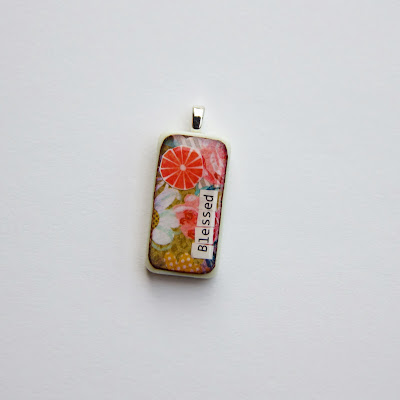
I am so excited about my next project! My local craft store
collage offered a workshop last week Wednesday for Domino Pendants. I called on Tuesday to sign up and the class was full. I was so disappointed and upset with myself for not registering sooner. I signed up for the waiting list with low expectations; I was third on the list. What were the chances of three people cancelling the day before the class?! On Wednesday I got a voice message that the class was still full, but they were offering another one on Friday. Yay me!
I am not going to go into a detailed tutorial. I highly suggest going to the workshop. I am not very familiar with Mod Podge Dimensional. I've also never used Mod Podge before. The instructors are very knowledgeable and can answer all your questions. Plus, they have a plethora of great tips.
And for all of you that watch "Portlandia", yes, I put a bird on it.
 |
| Close-up |
Materials:
Domino or mini domino
Mod Podge glossy or matte
Mod Podge Dimensional Magic
E-6000 adhesive
Photo latch or pendant loop
paper for collage
Directions:
Create a collage by gluing paper onto the domino using the Mod Podge. It doesn't matter if you use glossy or matte because you're just using it as an adhesive and not as a top coat. (The Dimensional Magic will end up being your final top coat.) When you are making your collage, be sure to really glue down all edges of your paper. If you do not do this, the Dimensional Magic will bend upward and pull away from the domino surface.
For the example shown above, I used SU! DP as the background, cut two flowers from DP (unknown) and stamped SU! bird image using Staz-on black ink.
Let it all dry thoroughly, again, to ensure that the Dimensional Magic doesn't get messed up.
Attach photo latch or pendant loop to the back of the domino using E-6000 industrial strength adhesive. E-6000 is very toxic so be sure to read the warning label before using. If you do not wish to use this, there's a non-toxic glue but I don't remember the name. Wait a bit for it to set, then you can go onto the next step.
Pour Mod Podge Dimensional Magic onto the top surface of the pendant. So, here's why I suggest you go to the workshop: if you've never used Dimensional Magic it is a bit difficult. The instructor explains that the only thing holding it up is surface tension. What does that even mean?
When you put it on, it looks cloudy, but it dries clear. Once you've got it on, you have to make sure it doesn't have any bubbles. There's a technique to that too, which I won't go into because you're going to go to the workshop, right?
You have the Dimensional Magic on, you've gotten all the bubbles out, now DO NOT TOUCH your project! You could break that "surface tension" the instructor was talking about and the Dimensional Magic will run down the side of your domino. You don't want that to happen. This is very difficult to do because you are so proud of your collage and you just want to hold it up to admire your creativity and well, it's just so darn cute. You must resist that urge! Do not fuss with or touch it! Don't even look at it. Leave it to dry for about 24 hours. (If you are OCD like me, I had to first prop the dominos up so they would lay level. You'll see what I mean when your magic dries and your surface isn't level, but if that doesn't bother you, then awesome.)
I can't wait to share the mini collages I created today. They are drying and I'm dying to touch them as we speak. You'll just have to wait with me until I can photograph them tomorrow.
Thanks for visiting!


